The steps to send and receive data to and from the PC via USB are as follows.
- USB communication interface settings This section describes the steps to switch the interface to USB using
- Standard app editor.
- OseComm32 settings
- Standard app's Bluetooth and USB communication depend on the settings of OseComm32 utility. I will explain the OseComm32 settings.
- Sending and receiving files
- We will explain the procedure for sending the data file of the Standard app to the PC side via USB.
(Important)
Windows10 or higher
USB communication interface settings
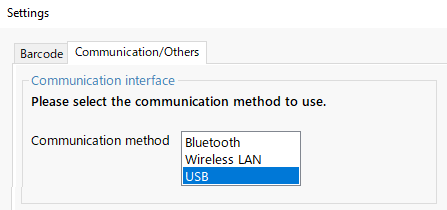
Switch the communication interface to USB using Standard app editor.
(Operation method)
- Press the "Other settings" button in the Standard app editor.
- "Communication/Others" tab ⇒ Select "USB" in "Communication Interface" and press the OK button.
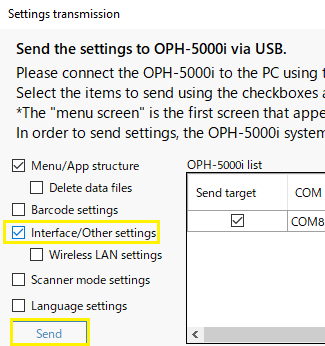
- Click the "Send Settings" button on the Standard app editor.
- Check "Interface/Others" and press the "Start sending" button.
Operation example:
(Caution)
- The OPH-5000i must be connected to the PC with a USB cable and the first menu screen of the standard application must be displayed.
- After sending the settings, close the "Send Settings" screen. Communication with OseComm32 is not possible while the "Send settings" screen is open.
Operation example:

Operation example:
Operation example:

OseComm32 settings
(Operation method)
- Please check the settings of OseComm32 Settings Utility.
Select "OseComm32 settings" in the "Opticon" folder in the start menu to start the OseComm32 settings utility.
Select "Default" for Single Instance Settings and press OK.Operation example:

- Select "OseComm32" in the "Opticon" folder in the start menu to start the OseComm32 utility, then click "Options" from the menu toolbar.
Operation example:

- Click "Communication Settings" from the dropdown.
Operation example:
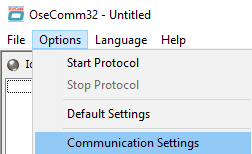
- Check the serial port on the communication options screen and specify the USB receiving port.
*The USB receiving port used may differ depending on the PC.
Operation example:

(Caution)
- If multiple OPH-5000i and PCs are connected, only the terminal with the specified USB reception port can communicate.
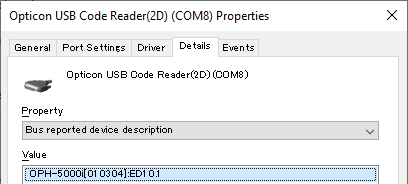
- If multiple OPH-5000i and PC are connected, to check the USB port number, click [Ports (COM and LPT)] in the PC's device manager to display a list of ports.
Operation example:
Right-click [Opticon USB Code Reader(2D)()Com4] and set the OPH-5000i serial number and system version to the value of [Device description reported by path] in the property details. is listed.
- Receive the protocol task settings file.
Select “Protocol Task” → “File Reception”.
Save files on the connected OPH-5000i to your PC.
*If you want to send a file on your PC to a connected device, select "Send File".Operation example:
 ⇨
⇨
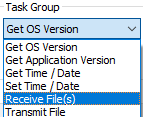
- We want to add a task to receive files, so click "Add task" and configure detailed settings for the file reception task.
- File name:Set the file name to receive.
- Check "☐Continue when unavailable".
- PC Download Folder: Please specify the folder to save the received file.
- Download type: Set the behavior when the received file exists.
- Advanced file name:Save the received file with the specified name.
When the settings are complete, click "OK".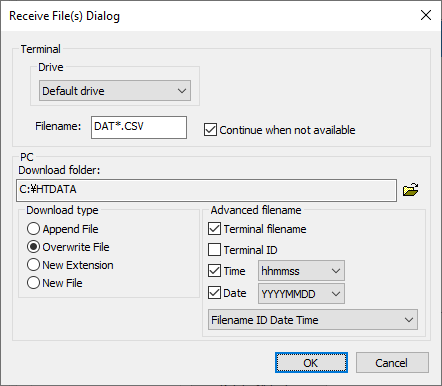
- The configured task will be displayed in the task list.Click "OK".
File sending/receiving
(Operation method)
- Click "Options" from the menu toolbar of the configured OseComm32 → "Start Protocol" from the dropdown and wait.
Operation example (PC side):

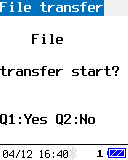
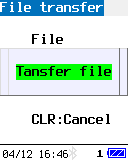
- Collect data using the collection task and select "File Send/Receive" from the main menu of OPH-5000i.
Press the "Q1 key" to start sending and receiving files.Operation example (OPH-5000i side):
 ⇨
⇨
 ⇨
⇨
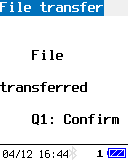
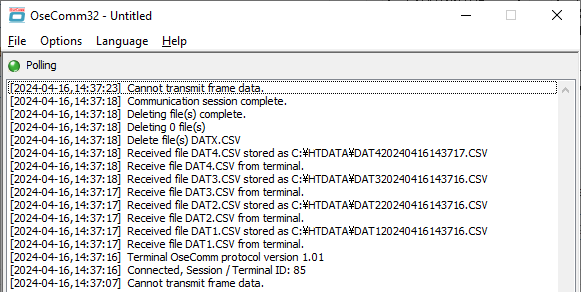
- Display the file information received by OseComm32.
Operation example (PC side):
Various customization
Last updated: 2025/01/23