1. Download the USB driver
2. Install the OseComm32 utility
3. Install OseComm32 configuration utility
4. Install Standard app editor
5. Update the OPH-5000i system
6. Create an incoming Bluetooth port
1. Download the USB driver
Please download and install the following USB driver from our website.USB-COM driver ver3.3.0.0
(Caution)
Please do not use the driver automatically detected by Windows, but be sure to download and install the latest driver using the steps below.Please install the USB driver using the following steps.
- Click the following link to open the "Driver Download" page.
- When running the installer, make sure that OPN/OPR/MDI/OPI/OPH/M5/M6 Drivers is selected in the installation options.
2. Install the OseComm32 utility
The OseComm32 utility is a Windows utility that connects various Opticon terminals and PCs and provides various communication functions.- OseComm32 utility version 1.0.17 or higher must be installed.
- This utility is compatible with Windows 7 or later. Other OSs are not supported.
- Communication errors may occur depending on the performance and configuration of your PC. In such a case, please try on another PC.
Please follow the instructions to install the Installing OseComm32.
3. Install OseComm32 configuration utility
The OseComm32 Settings Utility is a Windows utility that allows you to configure settings that are effective when using the OseComm32 Utility on the OPH-5000i.- When operating the OseComm32 utility using a Bluetooth port, operational problems may occur due to starting multiple instances. When using the OseComm32 utility with a Bluetooth port, we recommend using this utility and setting it to single instance mode.
- When operating the OseComm32 utility on Windows 10's Bluetooth port, a rare problem has been reported in which a communication error occurs. When operating with Windows 10's Bluetooth port, we recommend enabling the Bluetooth automatic recovery setting of this utility.
- This utility is compatible with Windows 10. Other OSs are not supported.
Please follow the instructions to install the Installing the OseComm32Settings utility.
4. Install Standard app editor
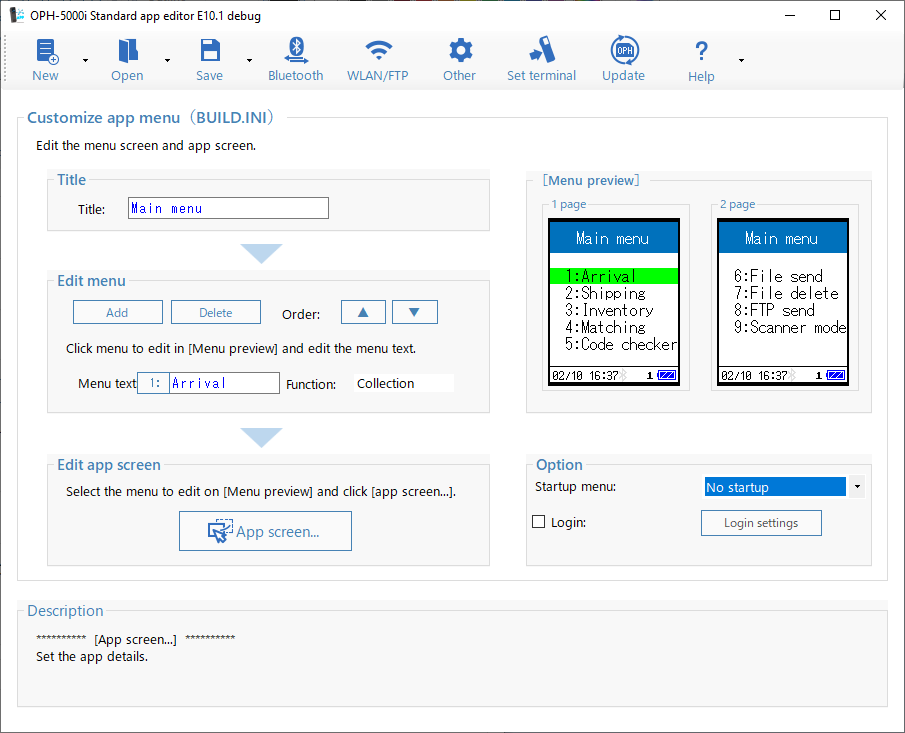
Standard app editor is a tool to customize Standard app.You can edit the menu structure, app content, and various settings of the Standard app.
For more information about the Standard app editor, see Standard app editor.
Install Standard app editor using the following steps.
- Unzip the file (SetupSTDEditor##_#.zip), run "Setup.exe", and follow the guidance to install Standard app editor.
- Double-click the "OPH-5000i Standard app editor ##.#" icon created on the desktop to start the Standard app editor.
5. Update the OPH-5000i system
(Important)
- If the OPH-5000i's OS is TH15J11 or earlier, the OPH-5000i's storage will be formatted when updating.
If you need to back up your storage data, please do so before updating.
For more information, please see Steps for updating from TH15J11 or earlier.
Update the OPH-5000i system using the following steps.
- Click the
 button in the Standard app editor and follow the guidance to install the remote Please install the installer.
- When the installation is completed successfully, the remote installer will start automatically.
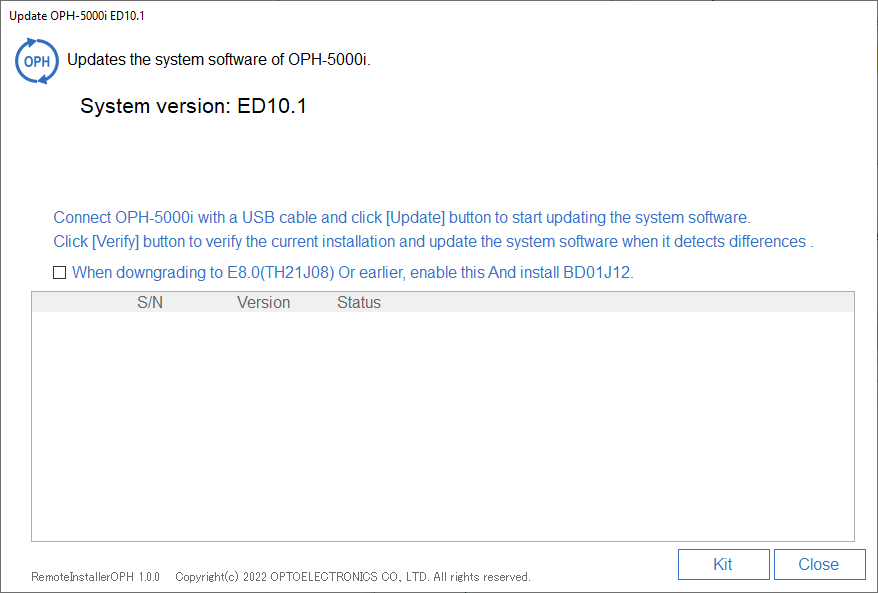
- Connect OPH-5000i to PC with USB cable. When you connect OPH-5000i to your PC using a USB cable, a screen like the one shown below will appear. In the screen example below, three OPH-5000i devices are connected, and the status of each device is displayed in a list.
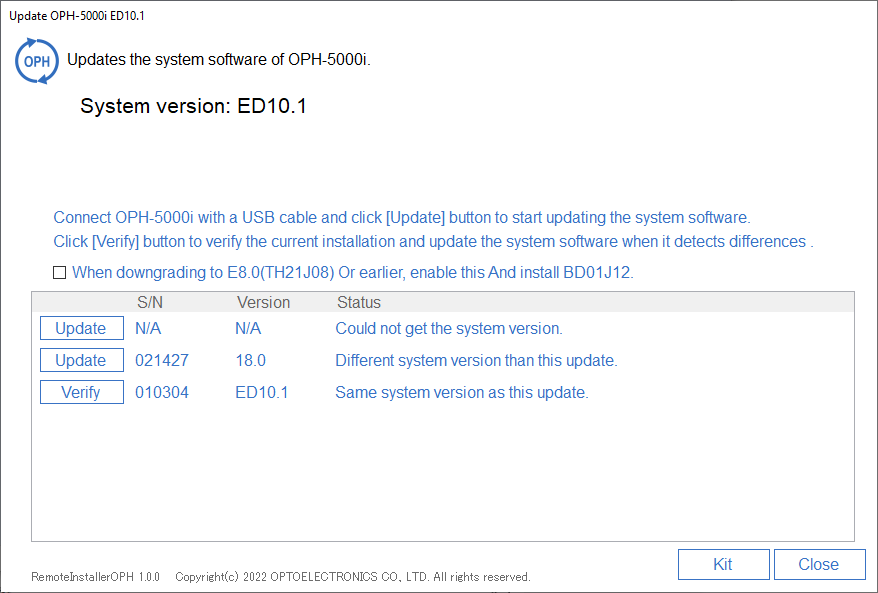
The terminal in the first line is a terminal whose system version is older than E7.0. In this case, the [Update] button will be displayed, and the serial and version columns will display "N/A >", but the status column displays "Unable to retrieve system version".
The terminal on the second line is a terminal whose system version is E7.0 or later. In this case, the serial number and system version of your device will be displayed in the serial and version columns, respectively. In this example, the device's system version is different from the remote installer's system version, so the [Update] button is displayed and the status column is "Update]. "color: blue">This update is a different version" is displayed.
The device in the third line is the device whose system version is the same as the version of this update. In this case, the [Confirm] button will be displayed, the serial number and system version of each device will be displayed in the serial and version columns, and the status column will be "This is the same version as this update" is displayed.
- Click the "Update" button to start updating the system software. When the update begins, the progress will be displayed in the following order in the status column:


(Caution)
Please be careful not to disconnect the USB cable while the above progress status is displayed, as this may cause a malfunction.
Devices with the [Confirm] button are basically devices that do not need to be updated, and the There is no need to press the [Confirm] button.
However, if the system components may have been partially updated using a special installation method, or if the update may have failed, select [Confirm] button and click Check the versions of each component on your system again, and if there are any differences with the system software that the remote installer installs, the same as if you clicked the Update button. You can update the system software.
- Make sure the status column says "Verified to be on the same version as this update".
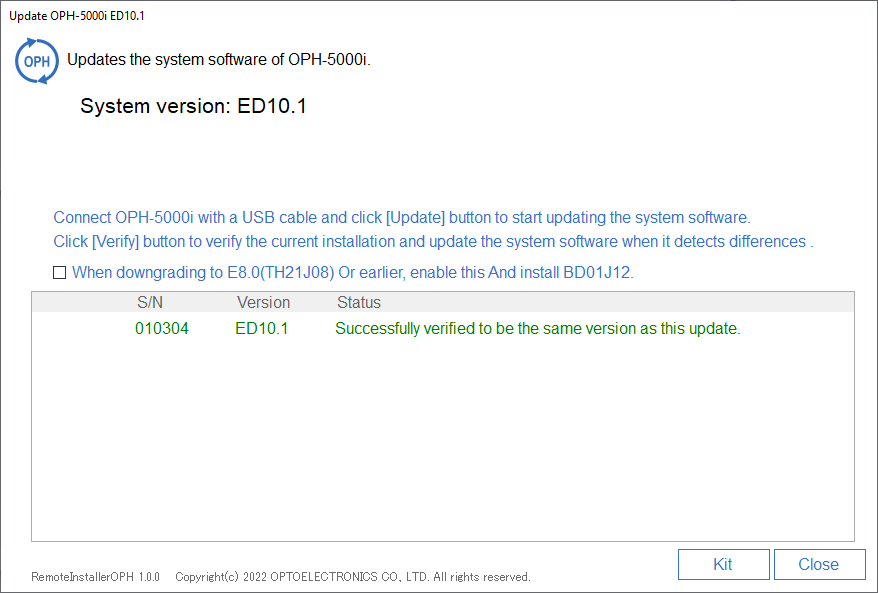 Also, confirm that "Update Complete!" is displayed on the device screen as shown below.
After checking, disconnect the USB cable and press the BS key on the device to restart the device.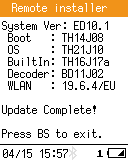
When an error occurs
If an error occurs for some reason, an error message will be displayed.
Example error message displayed in the remote installer status column:
Communication timeout error
A communication error has occurred
Example of error message displayed on the terminal screen:
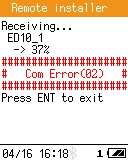
If an error occurs, unplug the USB cable, wait about 2 seconds, then plug the USB cable back in and try updating again.
Also, if you are updating multiple devices at the same time, please reduce the number of devices being updated at the same time and try again.
6. Create an incoming Bluetooth port
This is a necessary procedure when using Bluetooth communication. Pair your PC and OPH-5000i and create an incoming port.
- Check the Bluetooth settings on your PC
- pair the OPH-5000i Pairing creates an incoming port on your PC.
Last updated: 2025/01/23
Copyright © 2022 OPTOELECTRONICS CO.,LTD. All rights reserved. - Connect OPH-5000i to PC with USB cable. When you connect OPH-5000i to your PC using a USB cable, a screen like the one shown below will appear. In the screen example below, three OPH-5000i devices are connected, and the status of each device is displayed in a list.
- If the OPH-5000i's OS is TH15J11 or earlier, the OPH-5000i's storage will be formatted when updating.
If you need to back up your storage data, please do so before updating.